Getting Started With Eclipse
Assumptions
- You have basic knowledge of web development.
- You are familiar with Git, Java (Spring), and Maven.
- You are using Eclipse IDE for Enterprise.
Note: Non-Enterprise IDEs do not support JavaEE. This may cause you to experience ClassNotFound exceptions when attempting to run spring boot applications that use the spring-boot-starter-tomcat dependency with a provided scope. If that’s the case, either change the scope to compile (not recommended) or run your own tomcat server.
Installation
As mentioned on the home page, you should
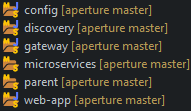
start by cloning the repository to your local workspace.
For me this will be in my D:/eclipse-workspaces folder.
You should have something like this:
You only need to create a Maven install run configuration for the parent project. This is because the parent pom contains each top-level project as a sub-module. By installing the parent project, you are installing the projects in the following order:
- parent
- microservices
- user
- user-api
- user-client
- user-provider
- user
- config
- discovery
- gateway
- web-app
- microservices
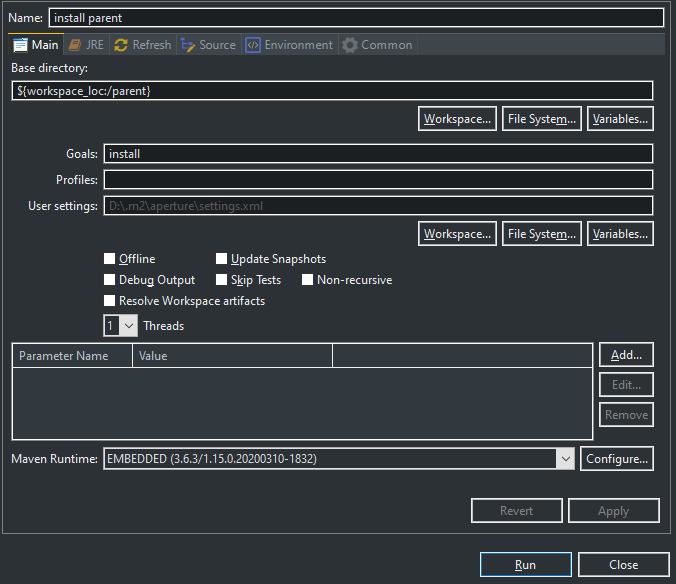
You can right click on a project, hover over “Run As” in the context menu and select “Maven Install” or you could setup a run configuration. To do that, go to the Run Configurations menu, select the  option in the left panel and then select the “New launch configuration”
 ![]() button at the top. From here you should fill out the name, base directory, goal, and user settings (if different from default). Your run configuration should look something like this:
button at the top. From here you should fill out the name, base directory, goal, and user settings (if different from default). Your run configuration should look something like this:
If you choose to install them one by one, remember to follow the installation order mentioned above. Once everything has been installed you can move on to the next section.
Configuration Repository
Before you can run the apps, there is one more dependency we should cover, the spring-boot-microservice-config repository. This repository only contains .yml property files. This is the location that the config service pulls and shares configuration properties from. When it comes to setting up the config service, you don’t have to keep your property files in a separate repository. You could store them in the resources folder in the config project or you could put them in their own folder within the same repository as the other Spring Boot Microservice projects. In any case, this article is going to assume you’ll use the provided config repository for your property files.
Running The Apps
There are 5 spring boot applications to run: config, discovery, gateway, user-provider, and web-app. The config service must be run before anything else because all other apps reach out to the config service to fetch their configuration properties. The discovery service must be run second because all service instances will need to register themselves to be accessible to other apps. The rest can be run in any order as they do not depend on each other on startup. There are two main ways to run the application in your IDE. The first is to create a Maven run configuration with a goal of spring-boot:run and the second is to create a Java Application run configuration. I chose to go with the later option but I’ll briefly describe how to setup the Maven run configuration and the issues you might face.
Running as a Maven Build
Starting in Spring Boot 2.2.0.RELEASE, the JVM process is forked by default when starting from the spring-boot-maven-plugin. You can read more about why that decision was made in this spring-boot issue: #16945. This has several consequences that determine how we should run the application. First off, the IDE won’t be able to associate the child (forked) process to the initial JVM process. This means your VM arguments won’t be passed to spring-boot and in some cases you won’t be able to terminate the process that is listening on its designated port. This also becomes an issue when you want to run the app in debug mode and are unable to trigger any breakpoints. Here are some options to get around this issue:
-
Disable Forking - One simple way to get around this is to disable the JVM from forking the spring-boot process. This can be accomplished by passing
-Dspring-boot.run.fork=falseas a command line or VM argument when you run the app. Alternatively you can set this property directly in the pom as mentioned in this StackOverflow post. Keep in mind that this will prevent theoptimizedLaunchsetting from occurring and is not considered the recommended approach. -
Remote Debugging - Another way is to setup remote debugging within your application. This is accomplished by pointing the
spring-boot-maven-pluginto a remote debugger running on a particularhostname:port. You can find more information on the changes you will need to make to the Spring Boot application here and how to create a remote debugger in Eclipse here.
Running as a Java Application
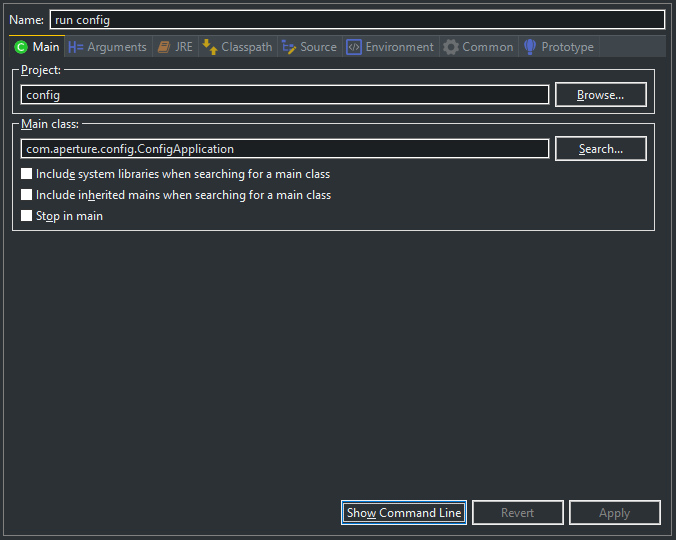
To create a Java Application run configuration, go to your run configurations and select the  option in the left panel. Then select the
 ![]() button at the top. From here you should fill out the Name, Project, and Main Class fields. Here are a list of the main classes for each spring boot app:
button at the top. From here you should fill out the Name, Project, and Main Class fields. Here are a list of the main classes for each spring boot app:
com.sbm.config.ConfigApplication
com.sbm.discovery.DiscoveryApplication
com.sbm.gateway.GatewayApplication
com.sbm.user.UserProviderApplication
com.sbm.webapp.WebAppApplication
In addition to telling the IDE which apps to run, we need to provide arguments or environment variables that these apps are expecting. Arguments are easier to copy & paste so let me show you what that looks like:
-DlocalConfigRepo={PATH_TO_LOCAL_CONFIG_FILES}
-DremoteConfigRepo=https://github.com/nosliwmichael/spring-boot-microservice-config
-DrepoUsername=username
-DrepoPassword=password
-Dspring.profiles.active=dev
Be sure to replace {PATH_TO_LOCAL_CONFIG_FILES} with an actual path if you intend to use it.
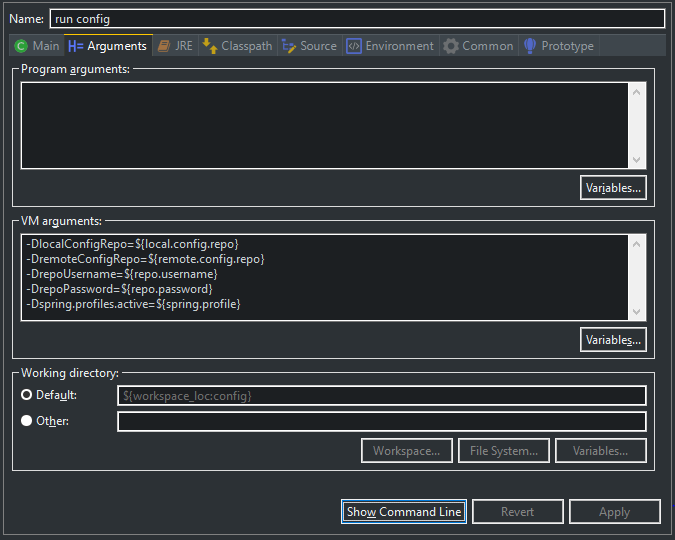
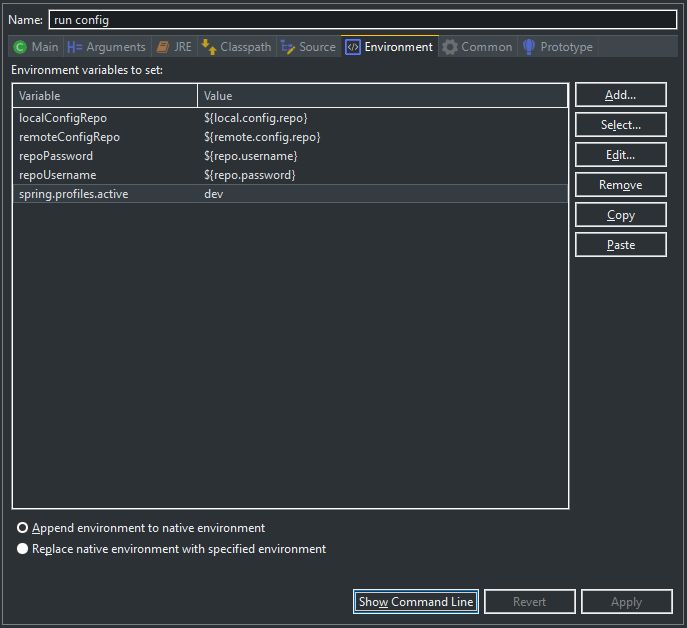
You can either set these arguments equal to a value directly like I did in the text example or you can set them equal to variables like I did in the image example. If you plan on placing these apps into containers and exposing these values through environment variables instead, you can simulate that on the Environment tab.
Now let’s cover what these variables are for and which ones are necessary. The spring.profiles one allows us to specify what profile we’re running the app in. You can make up your own profile names if you want. Just be sure to update the .yml property files to accommodate them. All apps can run local, dev, and prod profiles. Use local if you want to test a standalone app by itself. Use dev if you want to test how the apps interact with each other. Use prod in a production environment. The config service has an additional profile it can run on called, native. Set this one specifically in the bootstrap.yml of the config app if you want to use it. I’ll explain what it’s for in a moment. The local / remote config repository argument should be obvious. This is the location that we’re storing the application specific property files we covered in the Configuration Repository section. The localConfigRepo variable is used when the app is run with a profile of “native” and the remoteConfigRepo variable is used when the app is run with a profile of local, dev or prod. The localConfigRepo can point to a folder on your machine or a place in your classpath. For that to work, you would need to update the bootstrap.yml property and change “file:///” to “classpath:/”. The remoteConfigRepo can point to a local repository on your machine or an external one. I should also mention that the username and password arguments are not required unless you’re configuration repository requires authentication. For example, if your github repo is set to private.
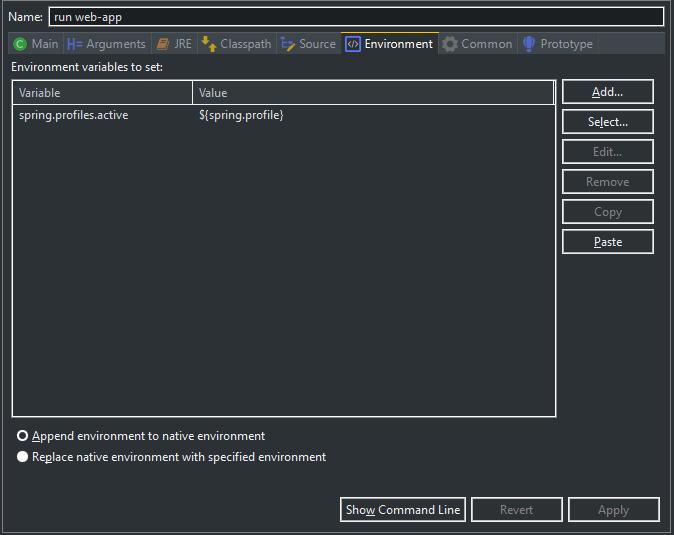
With that, you should be able to run the config app with no problems. The run configuration for the other apps only require the -Dspring.profiles.active argument.
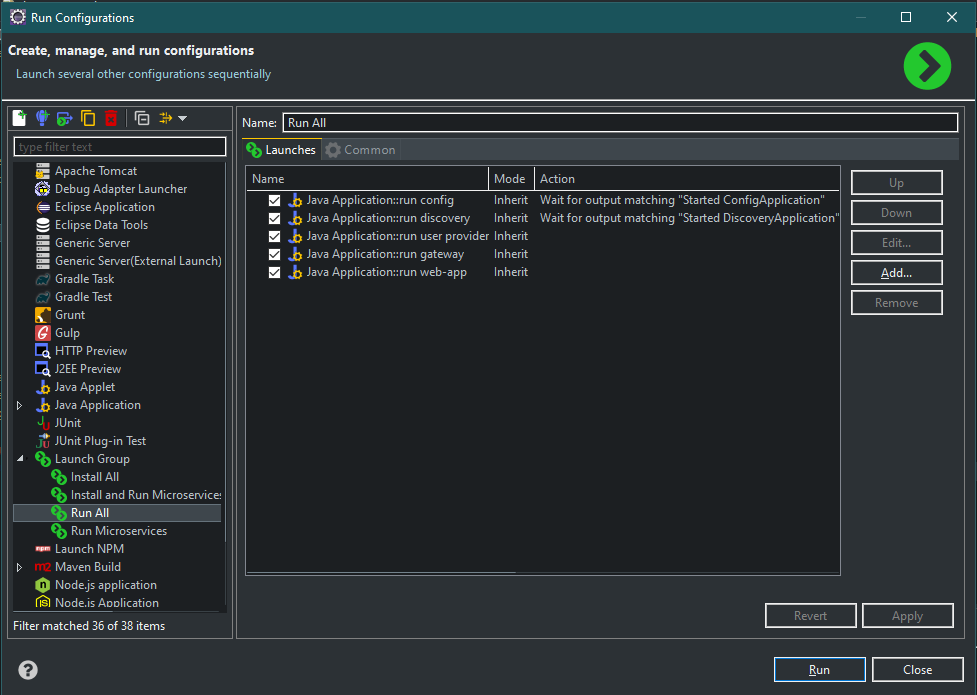
To simplify the installation process, you can create different Launch Groups in your Run Configurations to install and run all of the apps for you.